Leave
Applications
create and apply for leave. Functionalities details:
-
Users can view all leave
applications and its status. Refer to Figure
1 Below.
Users can create and edit leave applications.
Leave Status are: "Applied,Planned,Void and Approved". Editing Approved leave will reset
the leave approval workflow.
-
Approvers can "Cancel Approval".
- An email alert is sent to the employee and approvers
when leave is "Applied" and "Approved". Approvers can approve the leave from
the email.
- Enable configuration "ESS.Alert.Leave.Enable"under "Linkweb - Company
Administration - Configuration - Human Resource Management -
Alerts".
The following rules are applied:
-
Hours taken must be greater than zero.
-
System will validate the leave balance if "Check
Balance" is enabled for the leave.
-
Minimum service years has to completed before leave can be
entered. This is configured in backoffice leave maintenance
screen.
-
Leave dates can not overlap with existing leave
applications.
-
When an employee applies for leave in future, system
calculates the projected balance the employee.
-
One time accrual is set to "No": System calculates the
number of accruals that would occur from the last accrual to the leave end date. This figure
is multiplied by the accrual amount.
-
One time accrual is set to "Yes" (excluding long service leave): System calculates the accrual
based on the leave anniversary date
-
Leave applications must be
in a Current/Future Leave Allocation Period
Reports
-
Leave Transaction Report
Steps to apply Leave:
-
You can apply
for leave for any employee that you have access to. Select the employee. The default
is the user logged in.
-
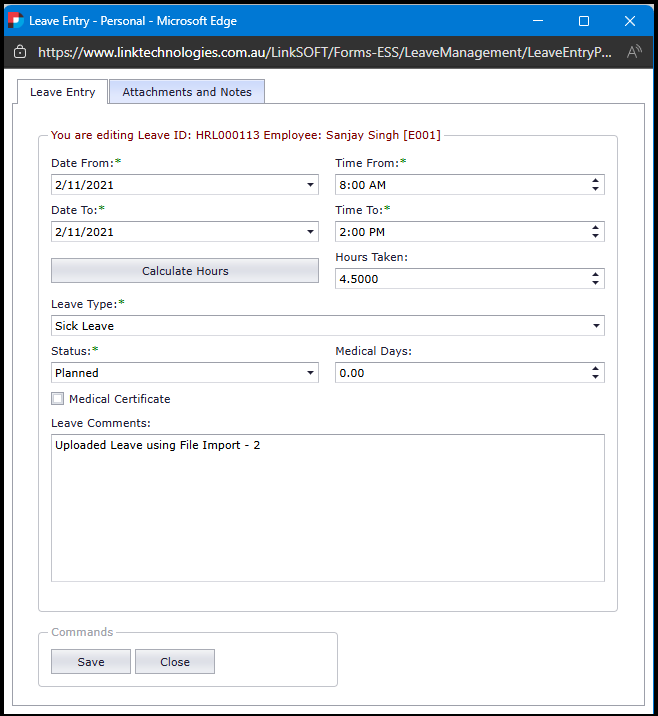
Click on
the "New" button at the bottom of the page. This will open the "Leave Entry"
form. Refer to Figure 2.
-
Enter
below details
-
Employee and Employee Name is auto updated.
-
Date From and Date To - Select
the leave dates. This is defaulted to the
current day.
-
Leave date is checked against the Calender setup. This
ensures users do not enter invalid dates at leave application.
-
Time
From and Time To - Enter the time from which the employee is will
be on leave. This is defaulted to the start and end time of the
employee's shift.
-
Hours
Taken - Enter the total hours of leave.
-
System will force users to click on the "Calculate
Hours" button if less leave hours is entered. System calculates the
expected leave based on the date, time and shift segments
of the employee.
-
Users with access to menu "LE006 - User can change
hours taken"
will be able to
override the hours.
-
Leave Category - Select the leave Cartegory
from the list, then
tick
the box for "Leave Allocation"
-
Medical Days
- Enter the number of medical days for
Sick Leave.
-
Medical Certificate - Tick this if the user is
attaching a sick sheet or medical certificate.
-
Leave
Comments - Enter the description of the leave application.
-
Save
-
-
Select
the Leave and Submit for Approval.
Figure 1: Leave Application

Figure 2: New Leave Entry

Figure 3: Edit Leave Entry